Saturday, July 21, 2012

Robot R-29. Inspiration for years to come.

  As I said earlier, when I started to learn programming I often simply typed in example programs from magazines that were easily available at that time. My parents used to buy me those and "Moje Atari" (My Atari) was one of them. Especially, one program had caught my attention and stuck in my mind for several years. I got back to it many times and ported it onto different platforms. Int the Atari magazine it was written in Atari basic for the little Atari. When I switched to Amiga I wrote two versions of it, one was almost identical with the original and the other one was more sophisticated remake that I made to please my little sister. Then, some decade later, I wrote it again in C# XNA on a Windows machine as one of my assignments on foundation degree.

Cover and the page with code for "Robot R-29" in "Moje Atari" magazin (1991)
The original "Robot R-29"
  Last summer (2011) I visited my parents and tried to transfer my Amiga projects onto MS-DOS floppy disks so that I could run them in an emulator later on. I managed to recover quite a lot, but unfortunately pictures I drew for Amiga adaptation of Robot R-29 didn't survive the ageing effect of time and I encountered several errors on that diskette. Although I have the complete AMOS Basic code for that game, it wouldn't be the same even if I tried to reconstruct the sprites and other pictures. I've found some utility software that allows to read erroneous files, though, and next time I'm in my old place I'll try to restore those files again. Hopefully it'll work.

UPDATE 1:
  During my visit at parents' place in the summer of 2013, I successfully ran the Amiga version of my Robot R-29. I ran out of time to copy the files and run the whole game in an emulator, but at least I took photographs of it. I think I tried to use different colours when I drew all images, but I had only a rough idea how they might actually appear. Until now I have only amber monitor plugged into my Amiga and I haven't changed it in ages, but at least I could see my great product again, and that made me very happy. As soon as I get a chance (hopefully during my next visit) I'll make copies of all files, and if I manage to run it an emulator it'll be the first time ever I'll see this game in colour. I wonder what it'll look like.

UPDATE 2:
 My recent visit in parents' place in the summer 2014 was quite successful. I made a null-modem cable and managed to copy lots of file from my good old Amiga over to my Dad's PC. I then ran it in an emulator and even managed to extract the source code which I'll post in another article together with all graphics and 4 additional levels I've found by looking at the source code. Those levels were created at the same time the game was written. Sadly, all images turned out to be black & white. I'm going to color them at some point and post that update, too. All in another post. Now, enjoy proper screenshots and compare them with the photographs I took last year.

Title screen (photograph).
Title screen (screenshot).
Level 2 (photograph).
Level 2 (screenshot).
And this is level 5, the last one in the original project (photograph).
Level 5 (screenshot).

Game over screen (photograph). 
Game over screen (screenshot).
Congratulations screen (photograph).
Congratulations screen (screenshot).

  The last version is my favourite so far. Initially, this was a university project, and except for visuals and maybe sound the game itself didn't differ much from the original Atari game. I wrote this adaptation in XNA C# which was requirement, and actually the first modern programming language I learnt. Some time later, after the project was submitted to my tutor, I spent lots of time adding different features, title screen, high score table, and new items in the game itself (for example keys didn't exist in the original game). I did that just for my own pleasure, because I enjoyed making this game so much.

XNA C# adaptation on Windows XP

  And now I'm looking forward to porting Robot R-29 onto the Mac and iPhone/iPad.

Tuesday, January 31, 2012

Programming on Amiga

  Programming on Amiga was just another great experience. I really enjoyed various demos that were so popular at those times (occasionally I also played games), some things were truly impressive. But I couldn't wait to try start programming on my own. It was obvious to me that since the computer was so capable it must be a great thing to write programs for it. The only problem in the beginning was lack of literature, I had the software I needed, because AmigaBasic came on one of the system disks and was complemented with some examples. First thing that caught my eye was the editor that worked in windowed mode and which was another huge leap in comparison to the little Atari.


  Another superb feature in AmigaBasic was its multitasking that it has inherited from the Amiga workbench itself. The same program could run in few windows simultaneously with other programs that were running on your computer.


  If you're interested in programming in this language follow the link below to download a manual:


  Great! - you say. Yeah. It was great, indeed, but speed wasn't the strongest point of AmigaBasic as it was simply an interpreter. But everyone got it bundled with their computer and operating system and if one had wanted to try programming that would've been the first language to try out.
  Fortunately, there was a better solution. Lots of different software was circulating amongst many friends and soon I became an owner of a copy of AMOS Basic. Although it didn't support the standard Amiga Workbench window system it was far more extended in comparison to AmigaBasic, and yet it was lot faster. Several people wrote many simple games in AMOS Basic in the 90s, and  communities which use it do exist even nowadays, like AMOS Factory, where you can find manuals, download software, or join a forum to get even more quotes. This website also links to other AMOS related website. I looked at it only briefly, but it looks like a very rich resource:


On Amiga Coding website you can look at and download other people's AMOS projects, download books, manuals, magazines (there's only one at the moment, though), access other references (some links might be dead) or read about history of the language or even news! Apart from that, there are also materials about different implementations of Basic (AmigaBASIC, BlitzBasic) and other languages, including C and Motorola 680x0 assembly language that I always would've loved to try.


  Let's look at some examples of clever creations in AMOS Basic. There are several screenshots on that website therefore I chose only those that I find most interesting. People have written games of nearly professional quality (for what AMOS and 16-bit Amiga have to offer):

Battle Space
Code Name Nano
DarkAngel
Prototype
Teeny Weenys
  Some utility programs also look quite good for software written in an interpreter language with limited resources:

Art School
GRAC 2 (Graphic Adventure Creator)
IFF Vector Ball Designer
Magic Paint Box
  Even quite a few disk magazines were written in AMOS Basic, MiggyByte was one of them:

MiggyByte diskmag
  Most people believe that demos on Amiga can be written only in assembly language. Well, this site largely disproves it. You can look at the videos that are linked to, or just see a few screenshots of Megademo 1 written by Daniel Bryde in 1995. It features even some 3D vector graphics.


  If you like AMOS Basic there's a link for you where you can download various development tools: AMOS The Creator, AMOS 3D, Easy AMOS, AMOS Professional, or if you need more speed in your programs there's also a compiler for you. Check this out:


  And get even more AMOS software here:


  Even the AMOS interpreter alone was much faster than AmigaBasic and to make things even faster AMOS offered a complied sprite scripting language called AMAL (AMOS Animation Language) which ran independently of the main program written in AMOS Basic. The language included several commands which allowed to use graphics and sound with a minimum effort in order to achieve quite interesting effects. The editor was also more advanced in comparison to AmigaBasic:

AMOS The Creator
AMOS Professional Version 2.0
Easy AMOS

  I got a chance to develop only in the regular AMOS Basic (AMOS The Creator) and as soon as I manage to recover some of my programs and get screenshots of them I'm going to post them here. I remember that I've built an electronic piano keyboard (all from logic gates and counters) and written a controller for it in AMOS. If I had had an opportunity to compile that program then the boosted speed would've let me add lot more functionality to it. The program was sending clock signals to a counter and them multiplexer selected one of the keys to read input from, and which then was sent back to the computer. Interpreter allowed to do that only with certain speed and didn't leave much time for any other tasks, like playing sound and controlling its envelope in real time.
  I wrote most of my programs in AMOS Basic in early 90s and then came back to it for a short time about a decade later. AmigaBasic was my programming language for only about two years, before I got a copy of AMOS and switched to this language for good.

Saturday, December 31, 2011

Happy New Year

  Having come back from wonderful Christmas holiday with my family in Poland I'd like to take opportunity and wish everyone  a wonderful new year filled with abundance, joy, and treasured moments. May 2012 be your best year yet!
  Also, from that holiday I have brought some files restored from my old Amiga. That includes games and other programs which I wrote many years ago in Basic, also some music (yes, I attempted that once upon a time), and graphics. One example can be seen below, all others I'll run in emulator and see what I can do with it. Some results of that process will be published here.

"Porthland"

Friday, November 4, 2011

The story goes on - Amiga 500

  I had pleasure to use turbo system on the little Atari only for about six months, and fortunately I didn't have to suffer from all those tape related problems too long. Soon, in early 1991 my Dad has bought me an Amiga 500. As a matter of fact we had to sacrifice the little Atari (just to get enough money), but it was well worth it. Amiga had brilliant specs:

  • CPU: 16-bit Motorola MC68000, with 7.09 MHz clock
  • memory: 512 KB RAM!!! which later we expanded to 1 MB
  • wonderful sound: 4 × 8-bit channels (digital sound!) at max 28 kHz with 6-bit volume in stereo
  • text: 80 columns x 32 lines
  • unbelievable graphics: 640 × 512 resolution or 640 × 256 in maximum 16 colours, 320 x 256 or 320 x 512 in up to 32 colours, or 64 colours in EHB mode and even 4096 colours in HAM mode. However displaying in vertical resolution of 512 was in interlace mode

  For those who don't have a clue what interlace is, it is a way of getting twice higher vertical resolution from the Amiga's custom chipset. But it came at a cost. Instead of scanning the whole screen at once, all the odd scanlines were "drawn" first, then all the even ones. That caused a horrible flickering effect and screens were usually far too shaky to be usable on a TV or even a monitor. To eliminate that effect completely so called Flicker Fixer needed to be used.
EHB (Extra Half-Brite) uses six bitplanes, or in other words six bits per pixel. The first five bitplanes index 32 colours selected from the full 4096 palette, and the sixth bitplane  causes display hardware to half the brightness of the corresponding colour component. Thus EHB allows 32 colours out of 4096 plus their half-bright counterparts.
  HAM (Hold-And-Modify) uses a very unusual technique to code the colour of pixels, allowing many more colours to appear on screen than would otherwise be possible. Yet, it has significant technical limitations and therefore cannot be used as a general purpose display mode. It could be used for the display and manipulation of static images. This is how it works: pixels are represented using 6 bits each; 2 bits are used as decision-making "control" bits, and 4 bits are used as "data" bits. The actual colour for a pixel would be the result of following the instruction of the control bits. The 2 control bits allow for four possibilities, which are as follows:

  • Set: Use the 4 bits of data as an index into the first 16 colors in the color palette. Use that color for this pixel
  • Modify Red: Hold the green and blue color components of the previous pixel. Use the 4 bits of data as the new red color component of this pixel
  • Modify Green: Hold the red and blue color components of the previous pixel. Use the 4 bits of data as the new green color component of this pixel
  • Modify Blue: Hold the red and green color components of the previous pixel. Use the 4 bits of data as the new blue color component of this pixel
HAM6 graphics mode
A parrot in HAM6 mode
  Now it is clear why HAM mode couldn't be used for things like games or animation. The same trick that makes it possible to display all 4096 colours at a time, also doesn't allow to instantly change neighbouring pixels from one colour to another, and may cause "smudges" on the edges of objects. One can see it in the image above, the picture simply isn't very sharp. Fortunately, it was perfectly sharp in all other modes. So, let's have a look at this great "computing machine":

Amiga 500 with a colour monitor and external floppy drive 
  I possessed (and still do) a slightly different configuration, with a TV instead of a proper computer monitor, TV modulator and a slim external floppy disk drive (which I acquired some time after buying the computer for money I made collecting mushrooms in local forest; another great, ecological and profitable activity). I've had the TV screen (for which cable I made on my own) for about 20 years already and it still works, although the picture it displays isn't great. And it's monochromatic. I guess I'm going to replace it with some small LCD TV at some point (colour !!!). Until today I've kept the original box in which came my first Amiga 500.

My Amiga 500 original box
  The computer itself still works and is placed in the same location I used it 20 years ago.

My good old Amiga 500
  As you can see that computer was armed with a 3.5" floppy drive (built-in) and I loved it from the first sight. For those who have never encountered one, I have pictures of both sides of a 3.5" floppy disk (my great game "Robot-R29 is on this particular one). Those used in Amiga had a 880 KB capacity, and back then I thought it was a lot. However some newer models, starting with later models of Amiga 3000 were fitted with the 1.76Mb Hi-Density disk (special Hi-Density floppies needed to be used).

Double-Density 3.5" floppy disk (top side)
Double-Density 3.5" floppy disk (bottom side)
  I mentioned TV modulator. Yes, Amiga 500 didn't feature that interface, and if one wanted to connect their computer to a regular TV through an antenna port (I guess most people did) they needed to purchase a TV modulator. That could be also done through the composite video output, however this model of Amiga generated only black & white signal through that output, which was rather impractical if one wanted to play and enjoy games with beautiful colour graphics. Therefore people spent money on that adapter, which was rather a bulky thing stinking out in the back of the computer, with two audio leads connected to stereo output and one input in the modulator. Yes, it turned the stereo signal into a dull mono. But it was an acceptable trade-off if one didn't have enough money to buy a proper monitor.

TV modulator...
...and a box it came in
  My computer came with a mouse, too. And as a matter of fact, it was the very first mouse I have ever touched in my life (at least a computer one). Also, it wasn't optical mouse like all those we see nowadays. It was a proper old school mechanical mouse, which you can in the second picture below. It's that little thing slightly sticking out from the little hole in the bottom of the mouse (sounds a little funny, that computer science is all fun, I'm telling you). That type of mouse was little harder to work with, and more demanding in terms on the surface (it couldn't be too smooth) on which it was used than present days mice, but at those times it was what everyone had.

Top side of my mouse which still works after so many years
And its bottom side (notice ball in the whole on the right)
  But mouse wasn't just an optional gadget like it could've been in case of the little Atari. It was a necessary device used to interact with GUI (graphical user interface), and that was completely new to me! Before that I might have seen a computer with GUI on the TV, but I don't recall I had encountered it. The first time I had a go at GUI on Amiga I was blown away. The difference between obsolete editor and direct mode on Atari XE where everything had to be typed in, and GUI on Amiga (which was called Workbench by the way) was so huge it could never be forgotten. Although in a way Amiga also had a similar feature, called CLI (command- line interface) in which user also typed in commands in order to perform disk operations, it was rather for advanced users and wasn't vital to be able to use computer. As you can see, everything was represented in form of little pictures (yes, they're called icons) which user could point with the mouse cursor and simply click it to make something happen. That simple!

The main window of Workbench 1.3 (the orange bar in the right part of the windows shows disk usage)
Some example applications open in Workbench 1.0 (main screen worked in 4 colours in 640x256 pixels by default)
  Mouse wasn't the only controller for the Amiga. The computer also was a great game platform with countless number of different titles released over its lifespan. Therefore pretty much every Amiga user had at least one joystick. I was no different, although I didn't play games too often. Rather my younger sisters enjoyed that kind of computer entertainment. One of these joysticks (the one on the right) is older than my Amiga. I actually started using it with my Atari, some time before I even got my Amiga. Joysticks were a sort of ancestors of nowadays game controllers.

Amiga joysticks
  Amiga Workbench itself came on a floppy disk, plus another disk in the set:
  • Workbench 1.3 Disk containing programs like Calculator, Clock, Notepad, Say, Prefs (system preferences) and CLI
  • Extras Disk with Amiga Basic, but also some tools: Fed (bitmap font editor), IconEd (icon editor), Palette allowing to change colours in Workbench, and Terminal which could be used to connect to other computers
My copies of Amiga Workbench didn't happen to be original, but I still posses them
  As you can see the Amiga was quite capable computer for the early 90s and Amiga 500 was actually computer that was first released in 1987. Soon after I got my first Amiga another model was released in 1992, it was Amiga 1200 which had lot better graphics and of course it was faster, although sound capabilities remained pretty much unchanged. Nonetheless, both Amiga's graphics and sound were pretty impressive at that time and actually no other computer at that price tag could boast it. For that reason most Amiga users had these two programs: Deluxe Paint (bitmap graphics editor) and ProTracker (music tracker).

Deluxe Paint
ProTracker
  As you can see it was a huge progress and a great upgrade from the little 8-bit Atari. First of all Amiga was a 16-bit computer which combined with the faster clock to the user meant much more speed as the result. 16-but technology also allowed to address much more memory. Superb graphics and digital sound were extremely impressive for that time, too. All that combined with Amiga's GUI based operating system made it first choice for several people in the late 80s and early 90s. To me it will always be a wonderful unforgotten experience.

Monday, September 26, 2011

A little history of my coding adventure

  It was so long time ago, more than 20 years. I was only 12 then, but I still remember the very moment when on a quiet summer holiday day, I was a little bored so I started browsing my Dad's bookshelves. Especially two books have caught my eye, and they were both on ZX Spectrum programming. Both books written in the early 80s, were mostly about programming in Basic.

The very first programming books I've read.
  I've read them pretty quickly and I liked what I read so much I started craving for more. Dad bought me some other books, few were about computers in general, and few others were on ZX Spectrum Logo programming language. 
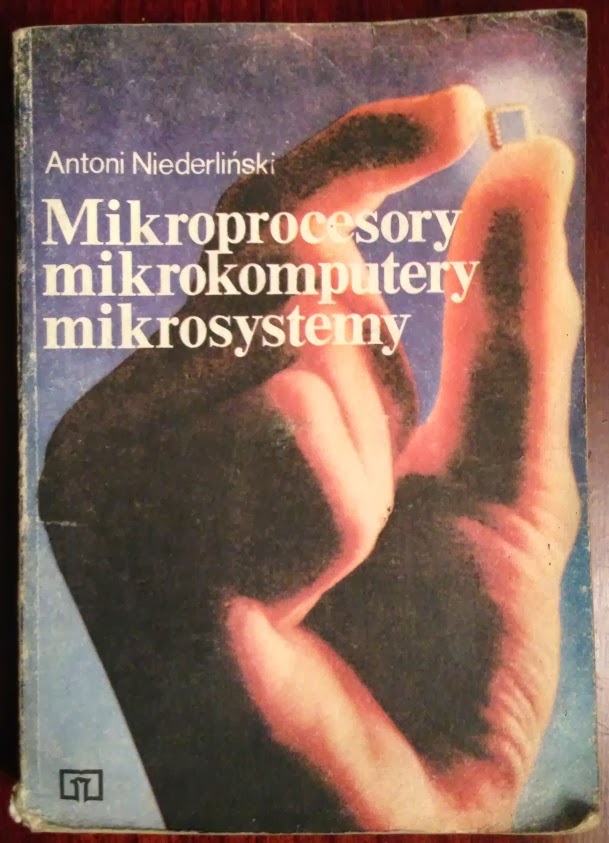
"Microprocessors, Microcomputers, Microsystems"
"Personal Computers"
  I remember that once I was caught by my teacher reading one of these books during a Polish language lesson. I had to beg my my teacher to give that book back to me. I think it was "Personal Computers". I just couldn't stop reading.

"Microcomputer at home and in the school" & "Microcomputer Meritum" 
  "Microcomputer at home and in the school" was written for ZX Spectrum which was very popular in Poland in the early 80s. It contained some interesting examples. Whereas "Microcomputer Meritum" was special in a way. Meritum was actually the only Polish computer that achieved any commercial success. Apparently there has been Meritum 1 and then Meritum 2, both with monochromatic graphics. And also there were some plans and project for Meritum 3 which was going to feature colour graphics but for some reason that computer has never happened. This book was quite extensive and included even electronic circuit diagram of the entire computer, probably in case if someone who's brave enough wanted to try and fix it.


Sinclair Spectrum Logo, part 1 - for the beginners
Sinclair Spectrum Logo, part 2 - for the advanced
  The Spectrum Logo and other programming books were quite interesting, but neither those nor the others I mentioned earlier could substitute for real programming and I started asking my Dad for a real computer. Finally it has happened and in Christmas 1989 I got my very first own computer, Atari 65XE.


  Let me give you just a brief overview of little Atari's specifications:
  • CPU: 8-bit 6502C at 1.77 MHz clock
  • RAM: 64 KB (that seemed to be a lot in comparison to 48 KB in ZX Spectrum)
  • ROM: 24 KB
  • Graphics: 40 × 24 max in text mode, 320 × 192 pixels in 2 colours, 160 × 192 pixels in 4 colours (and several other modes, 16 altogether), 256 maximum number of colours (16 colors with 16 intensity levels each)
  • Sound: 4 channels (mono), 3.5 octaves (4 × oscillators with noise mixing, or 2 × amplitude modulation digital)
  • Operating system: Atari 8-bit OS / Atari Basic


  My Atari looked a lot like the one you can see above, and was in exactly the same configuration, the computer itself, tape recorder, power supply, and joystick. I also got a few tapes (oh yes, tapes) with it so we could play games. We got it all set up, connected to a TV set and here came the first disappointment. Those tapes wouldn't load! Fortunately we found a friend who helped us with his tapes. But those were games, and mostly my sister enjoyed them. I needed something different, something more complex, challenging and absorbing. Soon I'd learnt one of my classmates had an Atari, too, and also a great textbook on programming in Atari basic. For several months that was hour programming "bible" and I often came to my classmate's place to copy some information from that book, which I later could try and practise at home. Some of those examples were quite practical, like for example title screens for my Dad's VHS tapes.


  Those were magic times. When I close my eyes I still can see and hear that simple software in action. Editors were not as sophisticated as nowadays (I would say they weren't sophisticated at all, and simply allowed to type in and run your code) and it was easy to make errors while typing in programs from magazines. The first screenshot looks pretty simple, but it also doesn't do a lot. Look at the other one and you'll see that it's mot easy to read or type in at all.


  Computer magazines at that time were a great source of practical knowledge. They provided young coders with working example programs along with explanations how they work. What one could want more? I only show you front pages of two titles, but there were several available at that time, some dedicated to particular platforms, and some were more general.


  At certain time (I cannot remember exactly when) someone came up with a clever idea how to make that typing in code a little easier and error free. It was quite simple, but great at the same time. A program which ran in the background (there was no multitasking on little Atari) summed up ASCII codes of all characters in each line of program and generated a unique two-capital-letters code, which was printed in front of that line. What needed to be done was to check whether the generated code was identical with that printed in the magazine from which program was taken. Look at those codes in front of each line number in the picture below.


  That was a great help. But little Atari (like all other 8-bit computers in the 80s) had tape recorder as standard storage and it was really slow, even considering the small amount of data being loaded into those machines. Often it took several minutes to load up a game (10 or even more minutes, sometimes even the length of the whole side of a tape, which is around 30 minutes). One needed to be very patient. It was absolutely forbidden to move during that process so not to shake the table on which the tape recorder was placed or the awaiting would start from the beginning.
  Finally I followed my friend's advice and "upgraded" my computer. My Dad took me to a company which installs turbo systems in Atari tape recorders. After all process the tape recorder itself looked actually unchanged, apart from an extra wire wound around the main cable and a cartridge with software supporting the turbo system. And, I think, there was also a switch on the back of the recorder allowing to turn the turbo on and off.


  That happened around 1991 and when I started using the turbo loader I thought it was the best upgrade I could ever dream of. Programs loaded up so much faster, it seemed like in no time. And no wonder. The transfer speed increased from about 600 bauds to, I guess, some 6000 bauds, which made it some 10 times faster. The difference in loading times could be felt right away, and the system also showed up to the end user on the screen in the form of specific menu.


  And then the screen also looked different (a little scary at first) when the programs were loading up. It resembled a little bit what could appear on a TV screen when a damaged VHS tape was played.


  For those who've never seen or heard any real 8-bit computer I've found some video on YouTube. It shows game "River Raid" by the legendary ActiVision being loaded with a standard speed on a real Atari 65XE. Enjoy!


  This video has been uploaded by FarEastOfTheBlues and this is the link where it can be watched in a better quality on YouTube:

http://www.youtube.com/watch?v=QyC1Ld19pq8


  Turbo system in Atari 65XE was a great thing and I did enjoy it. Although it featured much faster transfer in comparison to standard system, it still had the disadvantages of a tape cassette. Namely the tape itself needed to be manually rewinded, fast forwarded and so on, in order to find required program. A good help, practised by probably every single user, was writing down counter readings for each program (so called cassette index). That wasn't so bad, but what if one lost that piece of paper with contents of the cassette? And still, there was no real (logical or electronic) connection between contents of a cassette and what was written on the inlet. This is an example Atari tape cassette:


  My cassettes looked a little bit like this one, with a handwritten index of programs:


  That brings back old memories. Good times when people had lots of time to wait for their programs to be loaded up. Rewind... fast forward... little bit farther... too far. Let's rewind a little bit again...
...and finally load that "River Raid". Oops! Title screen. At last.